
Stop Doing this Resistance Band Exercise: Why do Resistance Bands Break or Snap? (Part 2)
DJ GuzdaStop Doing this Resistance Band Exercise

- The position of the resistance band during the exercise subjects it to high levels of friction. The increases the risk of injury because the resistance band can snap with out notice at any time.
- The resistance band is easily over stretched
The X Band Walk could reasonably replaced with a similar exercise using a mini band above the knees, just below the knees or around your ankles. Click HERE and HERE for our Youtube videos on how to perform to perform 2 different banded walks that might create the same stimulus as the X Band Walk without the same damage to your resistance bands. If you need Mini Bands, you can click HERE.

OVER STRETCHING
It is a very safe and responsible practice to avoid stretching the resistance band more than 2x its resisting length to prevent it from snapping prematurely and increasing the wear-and-tear. Over stretching the resistance band in addition to increasing the amount of friction on the significantly increases the risk of the resistance band breaking.
Over stretching happens in two ways during The X Band Walk : when the band is pulled upward to created to tension and when the user's leg is pushed out to the side.
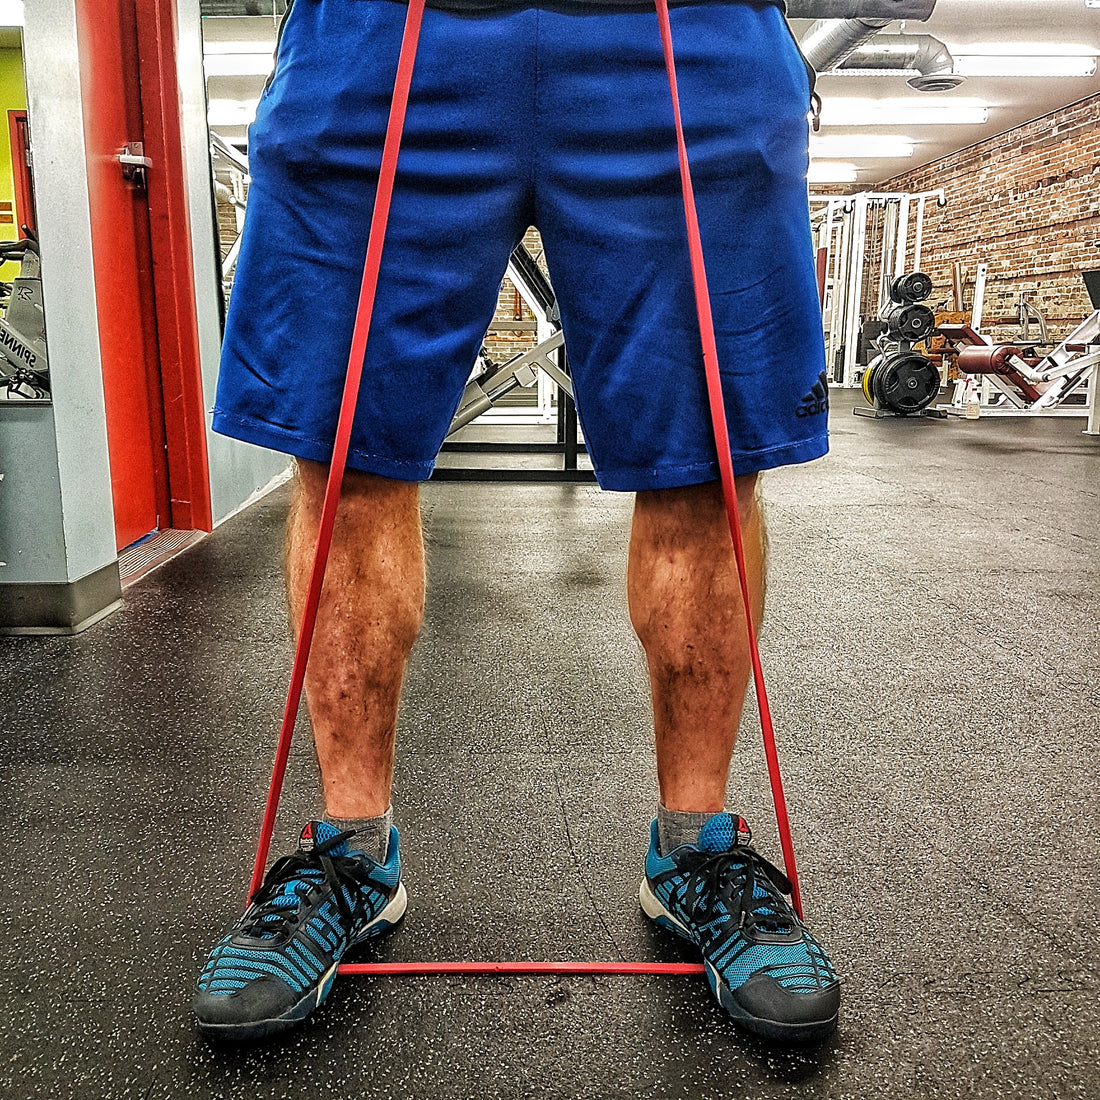
What might be particularly risky in this regard is that the resistance band is stretched between the user's feet and anchored at both sides while either end is pulled upward. What remains between the user's feet is a relatively short piece of working resistance band that is under high tension and also subject to a lot of friction.
In the photo below, the user is working with a 41" band which creates a 20.5" closed loop. However, the working length of the band is only the distance between the user's shoes.
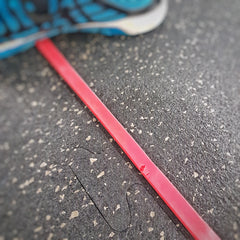
An important point to note here is the band position on the outside of the user's shoe. With the band being pulled upward it becomes tight against the user's shoe. When their leg is pushed out to the side, this will also increase the effect of over-stretching the can.

What Are the Options ?
If you have a chance to look that videos in the links above, you may find some alternatives to the X Band Walk there. If you do not have Mini Bands available, the user may also remove their shoes (if safety and all reasonable factors are considered) to at least reduce the friction on the resistance.